Monday, November 21, 2011

Pumpkin Pie - The white, the brown and the in-between

Pumpkin pie, the only thing I don't quite like about making this is the prep. Envisioning the steaming and mashing the pumpkin makes me feel exhausted even before I start.  And I hate it this morning when I bought the wrong kind of pumpkin that costed me twice as much.

I then digged out my pressure cooker I bought from Shanghai. Although it looks as if was built before WWII, it served me right. Pumpkin was fork-tendered within 10 minutes!  Of course darling, you have to cut in pieces so it cooked faster. Dont' throw it in the pot whole as if the knife is non-existent.


Is this real? 

I usually make the pie crust well ahead of time. It stays fresh in your freezer forever if you handle them properly. I normally fully bake the tart shells, let cool completely and keep in air-tight container like Super Lock container. And put in the freezer. Believe me, it stays good for months. 

Sweet pie crust (blind baked)

180 g butter, cold, cubed
340 g  cake flour
-----
40 g ground almond
110 g icing sugar
a pinch of salt
-----
80 g of egges (1 large egg + 1 yolk)

In the mixer with paddle attached, beat butter and flour until resembles sand. Add ground almond, icing sugar and salt. Blend swiftly. Add 1 egg first, if it appears that the dough consistency is pliable (looks like play dough), do not add yolk. Blend quickly until just combine. At this point, if the butter starts melting, pat down the dough and wrap with plastic. Rest in the chiller for 10 minutes. 

Thinly flour working surface, roll out the dough into 2 mm thick.  Line into 10-cm individual tart rings, press and then cut the edge with scraper or with the dull side of your knife. Fork the bottom of the tart shell, rest in the freezer for 5 minutes or in the chiller for 10-15 minutes. Bake at 180 C for 10-12 minutes. Rotate the pan half way through if you spot the tarts are not evenly heated. Let cool. 

Filling  - makes 13 shells (below recipe yields 1,050 g of batter. Each 10-cm tart shell holds 80 g filling)

425 g of pumpkin, steamed, mashed with fork
3 eggs
70 g light brown sugar
80 g of granulated sugar
1 tsp of cinnamon
1/2 tsp of ginger
1/4 tsp of freshly ground nutmeg
1 tbsp of all purpose flour
1 tsp of vanilla extract
a pinch of salt
---------

120 g of unsweetened evaporated milk
240 g of half and half (or whipping cream)

In the food processor, blend together the first nine ingredients. Then pour in the liquid, or if your food processor is too small, transfer to a bowl and blend well. I incline to infuse the batter overnight for deeper flavor but was too keen to see how it comes out so I decided to bake it right away. The recipes that use brown sugar always make me nervous, I hate to see my goodies discolored. There are quite a few brown sugars in the market, wide variety of different colors, graininess and thus not very easy to judge which one would suit the recipe. I have not many choices though...after one of worst flood hits Bangkok, some of the grocery items suddenly disappear from the shelf....for good. 


I compare the result of using dark brown sugar compared with the white one (I didn't have the 'light brown' sugar on hands). Here, I made two batches of batter.


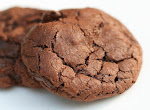
The darker batch seems nicer..... however when it was baked, the color became a lot darker , brownish, way too brown (see the square tart below) which doesn't look very appetizing. There are small cracks too which I have little or no idea of why it happened. The upper left tart is the one with white sugar, the surface looks pale, clean and nice. It puffed too. The upper right is the combination of both batches with dark amber color, which I like best. 


Baking - Bake @160 C for 25-30 minutes just until the rim firm up and the center is still wobble when you shake the tray. Always bake them in the tart pan or they'll break or perhaps leak. Keep in fridge until serve.

All of them tastes really good. The one made with white sugar has lighter taste (I tend to say , compare to their peers it was a bit boring.) while the one with dark brown sugar pronounced spices. Taste wise, I would put the red ribbon to the square tart. Too bad the look doesn't seem to be a winner. 

I do love the combination of crispy tart shell and custardy pumpkin. I am glad the tart shell doesn't get soggy the second day around although I put them in a loose plastic wrap in the fridge. Keep in mind as well, you have to keep these tarts in the fridge until just before serving. I put them out on kitchen counter with 27 C room temp, it starts to get soggy.

It tends to weep on the surface when left out on the counter which makes it looks more shiny and I don't mind though as I'll put whipping cream on top at serving. Cook-illustrated recommends to pre-cook the pumpkin puree to get rid of water but I found my homemade puree is too thick and cooking them up would only leave me a messy sticky  crust on my pan. But if you find the puree too runny, whether homemade or canned, a good practice is to evaporate some of the excess water. 

Spices - The original recipe calls for only 1/2 tsp of cinnamon. I double that up because I felt ginger overly striked my tastes palate....so need to balance that out by adding more cinnamon. I do recommend you always taste the batter before baking and adjust spice according to your liking. 

Family size pan - If you make the 10-inch deep dish tart, roll out the dough to 3mm thick so the proportion  between thicker custard and the tart shell are satisfyingly-balanced in a bite (I think). The baking times varies, depends upon thickness of the pan. I recommend 40 minutes and check every 5-10 minutes. 


Here is how it looks after baking.
With thin maple syrup layer and ginger snap cookies


With whipping cream and a touch of cocoa.

Bon Appetit !

Friday, April 23, 2010

My choux doesn't shine....my past (random) failure


I have been successfully making choux a few times as of late. Then it struck me one day when my my batter just flopped in the oven. Well, they weren't really flopped, or deflated or anything. They just didn't rise at all.

The 10-cm fully-baked choux came out pretty much the same size as when they went into the oven, no puff, no air pocket for the filling or anything. Imagine bread sticks that waiters bring to your table when you visit Italian restaurant, that what they looked like. Despite disappointing result, they tasted great, tasty and buttery, a bit better than salty crackers. I was thinking whether they could perhaps become one of the most popular finger snacks ever made. However, the whole tray went directly to the trash.


There are a few things I want to share, not sure though if my theories are correct. I have been trying to google the instructions, to see if anyone talked about things that have been clogging my mind, none mentioned in details how the batter should be cooked in the pot , which I think IS the key to success. None even mentioned how batter consistency should be like before baking.

Here are un-confirmed theories of mine based on lecture in class and 7-8 repetitions at school and home.

- Choux batter needs to absorb as much as liquid as possible since it needs moist/steam to push up its structure in the oven (there are no other structure-builders such as yeast or baking powder here). This is achieved through gelatinization process where starch swells hot liquid while cooked in the pot. It starts at 60-65c and continues. The target temperature of the batter is around 80-85 C.

- The swelling process begins when you dump all the flour, all at once, into boiling water (this is done off heat) Why "all at once"? I presume adding flour little by little would quickly over-cook the flour into dumplings. Also, the all-at-once thingy brings down water's boiling point to target gelatinized temperature ? Perhaps?

- The purpose of precooking/drying dough in the pot until it dries out/or so called "forms a ball and leave thin film at the bottom" is to;

1) complete the gelatinazation process , to let the mass of clumped starch evenly heated. Also keep in mind that you need the dough to be as hot while stirring (optimum temp is 60-70 c, which is why most instructions advice medium heat***) . 2) to dry out the dough as much as possible so it can absorb liquid from eggs at its best capacity in later steps.

*** I have seen my classmate did the precooking at very high heat (we had exam, and she was in a hurry) I presumed she must have stirred it crazily quick, or the dough could have burnt. For me I used the medium heat and stir at my snails pace until the dough's consistency was similar to that of almond paste (or clay).

- Cool down the dough before adding eggs? eh...may be...but I find out... whisking the "beaten" eggs on to the hot batter vigorously is a practical way to mix. (so you don't have to cool down, just mix in , quickly. It's fast, it's okay to do. So, let's do it.

And here comes last part (but not least) before piping, it's when we add eggs. Yes, sounds simple but read this carefully, I believe this tip is the secret in making 1) well-puffed 2) well-shaped choux.

- When you add eggs half way through, notice whether the batter becomes too runny to pipe (see batter texture we want to achieve below). If it is, bad news, the dough is not sufficiently cooked/dried out in the pot, thus low-absorption ability. If this happens in class, chef would advice throwing this away and start over. If this happens at home, you may continue to add more eggs as called for and bake that runny batter anyway. It still puffs up nicely but keep in mind the batter is too runny, it won't hold any shapes as you wish it would. Alternately, you can fry Churros/Funnel cake using this batter.

- The goal we want to achieve - batter must be pipable, not too stiff/too dry to pipe that it rips off the piping bag, not too soft that it cannot hold the shape or flats out right away when piped on baking sheet. Below is a sample of the batter. To test, with the spatula, scoop up the batter, if it drops down and leave hanging V-shape , it's good to go. Or, when you drag finger to cut through the dough, it slowly pulls back on , covering the gaps.


Now, I found quite a few websites left out these critical parts of how the dough consistency should be like. Of course baking choux is easy, but making it nice and "consistent" is not as easy as it seems. Most amateur bakers don't cook the batter properly in the pot.


Even worse,  they continue adding eggs as the recipe calls for, no matter how runny the batter is and end up having flat choux (although they have satisfying big air pockets). Some instructions advice us to stop adding eggs whenever we achieve piping consistency/texture, regardless of (too) little eggs we've added. Result? too little eggs, not enough liquid, not enough steam in the oven thus no push-up for the choux. Final products are weird looking buttery bread sticks with no air pockets just like what I experienced.

- Oven temperature - If you have fan forced oven, 170-180c would be appropriate. For bakers oven , it's 190-200 c for the first half and 180 c for the rest. Baking time depends largely on the shape of the choux and how crowded you lay them on the tray. So you may check for the doneness 1) surface is evenly golden brown, no white streaks appear on the cracks 2) it springs back when gently push and 3) the bottom is evenly brown out. Be careful not to open the oven door too early, before they fully rise otherwise the steam will escape and they will collapse. Nothing can be done to fix that.

Do not crowd the tray, for some reason, it would take a lot longer to bake them through. And then, if you happen to open the oven before they puff, you know you would regret.

I won't mention the process after baking such as poking /cooling down and filling. There are some other tips which I haven't tried such as spraying water into the oven before baking to increase steam. I personally do not think it would help largely because the steam that help pushes the choux is trapped inside starch molecules. Well, if anyone can back this spraying tip with your experiment, please do let me know.

And here is a very informative website I found, with lots of beautiful illustrations. He mentioned a good trick to prevent cracks on surface. I haven't tried the mix of bread+pastry flour, which is interesting. If anyone tried, again, please let me know the result.

Hope your choux shines !

Sunday, March 14, 2010

Mogador - Who would have known it is de-li-cious

What is Mogador?....I didn't have a clue of what it meant. Perhaps it was the name of a city somewhere, I thought. I wiki'ed it found out it was an isolated city of Moroccan where the French Troop disembarked in 18th century. Nothing much related to the raspberry puree soaked cake I was about to make. (!?) If anyone knows, educate me please.

By the way, I doubt why the French named quite a few of their cakes after their cities? I know we have some city-named cake with description attached to the cake i.e. Boston creme pie or New York cheese cake or Mississippi mud pie but do you know how Paris-Brest or Mogador look like? Um....may be it was their tricks to keep our curiosity alive.

I searched the key word 'mogador cake' and finally saw chocolate mousse cake topped with jam. Not as fancy as I thought. Fine, I had to make this in class anyway.

In the demo class, Mogador was made with chocolate sponge. Good news, it's not quite an artery-blocking/buttery-buttery cake. There is no butter added in the sponge. The sponge itself is pretty dry but later will be soaked with tangy raspberry puree. Chef insisted repeatedly, more than 3-4 times in the demo that all of 130 ml of raspberry puree must go in to an 8 inch by 3/4 inch high round sponge cake. Wow...that was a lot. But you know what. She is right. All the good tangy-sweet juice m-u-s-t be there, or you won't get happy customers. Here is what I meant by soaking the sponge. Notice the color, the sponge was chocolaty before.


I live in the tropical. Raspberry is somehow a luxury kind of fruit (just like when I lived in Shanghai, my Durian-no-thanks is considered precious fruit of all times for Shanghainese durian lovers). The puree we used in class is of Boiron, of course, imported from France. Judging from fancy, nice, stylish packaging, I am sure it would cost me quite a bit to buy this finished product. After class, I swung by a wholesale grocer near by to check it out. I was wrong.
A pack of frozen raspberry costs me 1/3 less than Boiron. Imagine me making my puree at home i.e. boiling+ squishing frozen fruit, discard rough meat, then I would probably end up only 2/3 of what I bought. Which doesn't make much difference had I bought the fancy packaging puree, let alone the fussiness and kitchen cleaning at home. Well, don't bother, I buy Boiron then. Okay, soak them up ! zzzzchzzzz.


Oh, just in case if anyone is keen in making raspberry puree at home, here is what my chef suggested off the class.

Raspberry Puree (10% sugar)
120 g Frozen raspberry
15 g of sugar

Bring these two ingredients to a boil. Squish with mixer and strain into fine puree. Let cool completely before use.

Back to the cake. On top of the sponge, here comes dark chocolate mousse. Raspberry and chocolate are always paired up well together, believe me.

Here is the sad part. Sounds simple but stupid me I made lame mistake making split mousse in practical class. Yes, it split !!!. I saw meself hitting me head ('me head', sounds like cute reggae accent, doesn't it?) , didn't know what went wrong. Having lost my mind for 3 seconds, I wanted to scream but was conscious enough there after not to panick the class.

Chef Geraldine, the savior, walked around, saw my poor thing clumping up badly. She gave me a dry but encouraging smile and say 'you probably need to do that again so that we have good mousse in the cake." [I agreed]

You know what, almost all the ingredients in class (except eggs, milk, sugar and salt) are imported from France. Although this has been incorporated into my (reasonably high) tuition fee but I did feel guilty to waste the whole bowl of President creme and Cocoa Barry's 58% dark chocolate. Oh dang it, all the goodies.....I was then envisioning under-nutritioned children in the third world and that I was asking them to forgive me that I wasted this much of food.....unintentionally.

What went wrong: I did temper the ingredients by adding 1/3 of cold creme into warm chocolate but guess I didn't do it properly. Chef Geraldine guided that whipped creme was way to cold and it clumped up chocolate, especially when I put the whipped creme bowl over ice bath before the mixing procedure and that also made the bowl itself colder that it supposed to be. That's it. (!?) Well, I actually had a lame excuse to use ice bath...I fear that the creme would melt , that's why....silly me! :-P

I corrected the second batch by, of course, I threw away the ice-bath right away after I was done with whipping the creme. Then put 1/3 of whipped creme into (room-temp) chocolate bowl, fold fold fold until well blended. Then added the rest of creme into chocolate bowl. Happy ending. Thanks chef.

Quite an adrenaline rush when you see the rest of the class was proceeding to decoration while I was still struggling with the mousse. Who cares, I got good mousse and I learnt how tiny detail could have spoiled the whole thing....of course I was so glad I made silly mistake. (Although it was very tempting to learn from mistake again, I will opt to do it right first time around).

So I piped out smooth chocolate mousse in the ring before filling it up to the top and flatted out surface. Sure, I needed to do it quickly before this little monster set up into a chocolate bar. I wondered if the practical room was way to cold that day or it was just me that worked at snail's pace....chocolate mousse did set up pretty fast.

Apologies that I cannot publish recipe from the class here. Indeed, these are not fancy things. I suggest you get chocolate mousse recipe from my hero's page Alton Brown. It would yield pretty much same good result. But be sure to use good quality chocolate though.


Decoration is something new to me. I always use this word to describe my lousy decoration...i.e. because it was 'new' to me which is why the deco is tilted here and there and etc. Well, it's how I sooth myself. Somehow I thought this is just a matter of god's gift , a bless to some people. I noticed many in the class are really talented at masking , decorating the cake and yes we are all started at the same point, zero. I envy them. I rally do. For me, I am sure am not gifted (shoot!) , I believe I just need one word..... practicing. I'll push myself a bit on that.
And here is the finish product of Chef Geraldine in the demo class. It's classy, isn't it. See, now you know what I meant by 'it just the matter of practicing'.
Bon Appetit!

Thursday, March 4, 2010

What I love most - It's the croissant day!!!


Last week was what I'd been looking forward to, making croissants. Wow...wasn't that g-r-e-a-t to finally make this goodie. My past experience is dated back 10 years (or more perhaps?) that I tried to make croissant out of a 20-lined recipe. Well...it was a total flop considering hot/humid weather in Bangkok that made the butter ran out in every possible ways starting from rolling and proofing. Now that I know a how-to, all I can say is that it's all about the little tips and techniques. Those who want to get start, I suggest you get a recipe here and see useful discussion here

Some observations.


- If you cannot source fresh yeast, use instant dry yeast, just weight up 33% of what required for fresh yeast.

- Coldness is your very best friend. If you live in the tropical, prep this in air-conditioning room. Or if not, use margarine instead of dry butter. I myself don't compromise for margarine as the after taste is not so pleasant. so, margarine is a no-no for me.

- Proofing the dough is tricky. Comfy temperature for yeast to grow is around 25-30 C. I would say 27 C to be precise. Also, at 27 C, butter stays nice and cold and is trapped in croissant layers. If you don't' want a soggy croissant dough, 25-27C is safe zone as butter melts nastily at around 32C.

- Rolling it a little tight. Press down gently as you roll would be a big help in making handsome croissants. I found out stretching the the tail while rolling is not necessary. But may be you can try both ways to see the difference.

I brought these goodies home. My sister and my mom just loved them, they raved about it for days. The crust was crispy and the crumb was soft and chewy. They said these are even better than the ones bought at the Oriental Hotel (one of our favorite bakery shops) and requested me to make this at home. Hey..hey, my arms are still aching from the class. Spare me, please! :-D Actually, I'm flattered, and of course , the school and the my pastry instructor should get the full creditability for this. Salute to them all.

Here are some variation you can make with croissant dough, decorating with pastry creme and fruits (in syrup). Nice, aren't they?


Wednesday, February 17, 2010

At Le Cordon Bleu Dusit, Become a s-tu-dent again !!


It has been almost half a year that I haven't updated my blog. Inevitably, tons of things that get priorities than blogging . Moving back to Bangkok was a one of the excuses. And you can imagine running errands from places to places indeed take (long) time especially under extremely extremely and extremely jammed traffic. I need to tone down my schedule a bit after all I couldn't finish 4 tiny errands as in my typical days Shanghai.

And yes, I took Basic Pastry class at Le Cordon Bleu Dusit. Although I wanted to yell out in my blog about my typical days at school or how my life is like at the turning point (from a banker to a wannabe-baker) or that I had a bad madelines day and etc., I was too torn out after 6 hours in class.

I will continue this blog to share my baking experience. For the time being , I think it's time to study for the practical class tomorrow. Phew..w..w.

Friday, September 25, 2009

Chocolate chip cookies


Oh my...my. It has been a big while since my last post. Not that I was travelling or busy with my work. I was busy baking, photographing and researching (of course, food-related). There are long long long list of items that I wanted to blog about. I wrote down on paper and post-its that I sticked around my kitchen walls. Okay, one by one. phew..w..w.


Chocolate chip cookies is a sinful snacks. Or you can consider it a meal if you have them from Levain. Here is my version with less fussiness. I just melt the butter in micorwave rather than cream it for 15 minutes as usual recipe calls for. I also opt to use bread flour, which tend to absorb more liquid than normal all-purpose flour. The reason i use bread flour is that , in shanghai, it is a lot easier to source bread flour (as you know, steamed buns are popular here.). Also, if you need the chewiness, bread flour would not hurt the texture. However, if you have all-purpose flour, you can simply use it , with same portion.


I like this recipe, especially with a touch of salt. It is just good that way. I normally reduce sugar to 90% (see recipe below). Storing: they are good 'outside' the fridge for a couple days. Best is to munch right away from the oven. So far I failed to keep them moist beyond day 3 even if I put them on Ziploc back. On day 4, they just turned into crisp and hard cookies no matter how they were stored, i.e. in Ziploc bag, in air-tight container, in the fridge or on kitchen counter. I found a tip on a web site that recommend putting a piece of fresh apple in the cookie jar. It claims this would help maintain the moist for a few days. But I wonder if those pieces of apple would turn rotten after 1 day (???). Would the cookies moist and molded? I don't know. If anyone try this, let me know.


This recipe makes 750 g of dough. So , if you make 30-g dough (for 3-inch diameter cookies), this batch yields 25 cookies.


No fuss Chewy Chocolate Chip Cookies -


2 C of bread flour (255 g or 9 oz) or alternatively, all purpose flour
1 tsp of baking soda
½ C of brown sugar
1 C of granulated sugar
1 tsp of table salt
1+1/2 sticks or ¾ C of butter (170 g or 6 oz)
1 egg + 1 egg yolk
2 tsp of vanilla extract
52% (dark) chocolate chuck, chopped.
Salt (sprinkle on unbaked cookies)

Sift dry ingredients together in a bowl, set aside. Make sure the brown does not clump up.

Micarowave butter in medium heat until completely melt (should not bubbling), mix in sugars. Stir with fork until they are completely incorporated and that you cannot see streaks of butter. Before mix in eggs, ensure butter mixture is not too hot. You can just simply poke a clean finger in the mixture and feel if it is too hot for your finger tip. If it is okay, pour in the eggs. Stir vigorously for half a minute until well-blended. Add vanilla extract, stir to combine


Add wet ingredients to the dries (or do it the other way around if you do not want to dirty too many bowl). Stir with fork until well blend. The good thing about making chewy cookies is that, it is a study animal, you don’t have to be kind. Just stir, smash, flip or do whatever to mix the dough.

Cover the cookie dough with plastic wrap. Push down the plastic so that it touches dough surface. And rest in the fridge until firm to make a ball, around 2 hours. For best color and taste, NYtimes recommend 24-36 hours rest in the fridges.
Talking aboug fridge, mine is not working well lately. I guess it is one of the very old models when anti-frost has not yet invented. So, whenever it was frosted, it stopped working. It just died. Then one day I found out my congee turned into “Gee” (as in "Gee! What is that smell!").

When you are ready to bake, pre-heat the oven to 325 F. If you want giant cookies, say 4-inch diameter, make 40-45 g of dough and then add dark chocolate chunks. I normally make 25-30 g dough, which yields 3-inch diameter, the right size to cure my crave.

Put the dough on the tray, lined with un-greased parchment paper, 2-inch apart. Flatten them down a bit. ***This is important*** Sprinkle salt very lightly on surface before you put the tray in the oven.


****this is also important (yes, notice 4 asterisks here!)**** bread flour differs in each location. Their ability to absorb liquid differs and this results in wet or dry dough that later reflect on the shape of cookies. The dough may not flatten at all. So, I suggest you try baking one cookies first and see if it flats out properly.If not, in the next batch, you can just flatten them down with your finger tips to the desired shape before baking.

Bake for 10-15 minutes for smaller cookies (25-30 g ball) , or 25 minute for giant cookies. Rotate the tray half way through to get them evenly browned.

They should be just a little dry out on the edge/surface but soft in the center. If you have thermometer, it should register 85C in the center. Do not over-bake or they will be just dry and hard. If the oven is too hot, the cookies will get burnt before they are done.


Remove from hot tray and cool on the rack.


Enjoy while they are warm. Got milk?


Monday, August 3, 2009

Sticky bun

After watching a clip on YouTube, Throw down with Bobby Flay- Sticky bun, I marked down my calendar on the upcoming weekend, "occupied all day". I needed to make this.

The recipe comes from a successful Flour Bakery-Boston. Joanne Chang, who runs the place and if you watched the clip, she won the challenge, of course. Since then, I started to google the famous Flour's sticky bun. People raved about it. The reviews/comments on Flour's pastries are something like this: to die for, extraordinary, worth all the time and effort, sticky buns on steroids, and much much more. The only complaint is about the place being too crowded that people described it as a madhouse, which, I find this rather be a compliment than a disappointment. No one can blame the place of its popularity. (!?)

Joanne uses Brioche dough. I had my first brioche years back. It was not impressive, a greasy type that left some kind of waxy feelings in my mouth. I doubt if this this recipe would throwdown my past brioche disappointment. Before I started , I read the recipe and I sighed. Butter butter butter, this was it. Brioche is born rich (of butter and egg) compare to other kinds of breads. Flour to butter ratio ranges between 50:100 and 100:100. Joanne's falls in the first category known as poor-man brioche. I am glad to start with the leaner version. The result was very satisfying and I do not think I would alter for richer dough. In other words, I do not want to spend my week end on the thread mill, if not necessary.


Brioche Dough:

2 1/2 cups bread flour
2 1/2 cups all-purpose flour
1-ounce cake yeast = 0.4 oz of active dry yeast, = 0.30 oz of instant dry yeast
1/3 cup plus 2 tablespoons sugar
1 tablespoon salt (or half the portion if table salt is used)
1/2 cup ice water
5 eggs
11 ounces butter, softened

Filling:
2 cups brown sugar
1 teaspoon ground cinnamon
1 cup pecans, toasted and chopped

Goo:
1/2 pound butter
15 ounces brown sugar
5 ounces honey
1/2 cup cream
1/2 cup water


First thing first. It's summer time. The weather is hot and humid. Kitchen temp is around 31 C and humidity is above 60% as it had been raining all week long. I was thinking that I might not need all the wet ingredients so I cut back half of the water in recipe.

Also, since I was skeptical of the result, I halved the recipe and used only 2 eggs (supposed to be 2.5 eggs as called for in the recipe) which weighed 95 g. So, in order to replace missing half egg, I added 25 g of water instead (well, egg white contains water, right), apologies for my love of convenience. I use the combination of bread and all-purpose flour as instructed. The cake yeast seems to be the problem for home baker like me. I used SAF instant yeast, reduced it to one-third of cake yeast which was around 0.15 oz. Be reminded that I halved the recipe. The tiny amount of yeast was almost beyond my scale capability to measure. I guess the scale accuracy is 0.05 oz so it blinked back and forth between 0.10 and 0.15.

As mentioned before, I cut back the water by half knowing that adding butter would make the dough soggy later on, especially in a warm/humid kitchen. The dough was really dry at first. But when added butter (it was half liquid-solid state and I think it was over melted. The instruction calls for soft stage), it became very wet and sticky.

I attached the hook to my stand mixer but finally changed to paddle. I continued to beat at medium speed for 15 minutes. The dough, or should I call it batter (?) was wet and it did not pass window pane test. And yes, even that I reduced the water by half the dough was wet. So I added 2 tablespoons of flour, beat further for 5 minutes. Well, ya I know....I was mumbling to myself that this was a disaster. I should have figured it out sooner that more flour was needed. Professional bakers who are reading this are so ready to whip me to death. zzchez...z..

The dough finally came off the bowl , which was a good sign. It almost passed the window pane test. I decided to stop the machine, feared that beating it further would mess up the leavening. The dough looked oily, soft and pliable. I rested the dough over night in the fridge. Note that the recipe requires to rest the dough for 5 hours.


Goo – Put butter and sugar in a non stick pan, medium heat. Reduce until very thick. Let warm. In a separate bowl, stir together honey, cream and water. Stir cream mixture into butter+sugar mixture, stir until well blended. Cover with plastic wrap and refrigerate for next day, it will become more solid after resting in the fridge.


Baking day – Turn on the oven to 350 F. spread goo on roasting pan, at least 2.5 inch tall, set aside. I have an 8" x8"x2” pan which was not tall enough. I later found out the goo boiled and overflew, a bit messy there .
On a flour surface, roll out the dough into approximately 1/4-inch thick. I would recommend 8"x8” rectangular perhaps? Combine the brown sugar, cinnamon, pecans and sprinkle evenly on the brioche. Or alternately, I sprinkled cinnamon generously until it covered up the dough then sprinkled brown sugar. I think I used around half cup. Keep in mind that the bun will be topped with Goo, so make it skimpy on sugar at this point, just enough to make nice brownish layer. Roll the dough up as tightly as possible as it will unwind during rest period. I wonder if it is possible to seal the edge? Some suggested to brush edges lightly with egg to seal. Well, I did not try that.

Warnings for those who work in warm kitchen. The dough tends to be sticky as you roll. So you'd better work quickly. I did so, tried my best to roll the dough into a nice rectangle but ended up rolling the dough unevenly into Oklahoma-state shape, approximately 8"x12", yielded 8 large rolls, 1 mid-size roll and 3 tiny rolls. Yes, I know I'm such a novice.

Each roll was around 1-1.5 inch thick. I placed 9 buns, evenly 1/2-inch spaced in the pan. For the 3 small rolls, I put them into individual muffin cups which are 1.5 time as large in volume. Cover with well-greased plastic wrap and allow rising until they expanded 1.5-2 times of original size. It took around 1.5 hr in my kitchen.

See, the bun hugged each other nicely in roasting pan. Zzch ! one photo shot for nicely proofed buns.

Place the pan in the oven and bake until light golden brown, about 30-40 minutes. I smelled the burnt caramel (as well as trouble) when the goo was sizzling and dripping out of my 2 inch tall pan. Oh no, I was hoping that my neighbor who are pensioners would not knock my door with walking stick and ask what was burning. If you have taller pan, do use it.

I rotated the pan at 25 minutes to get it cooked evenly. After 40 minutes, the top turned light golden brown. I took them off the oven, let cool for 20 minutes and then invert onto a large plates.

For the 3 tiny pieces that I placed in muffin cups. I baked with the rest of proper-sized buns. They turn out to be nicely shaped, wrapped up tightly in muffin cup. When inverted, the goo did not make them soggy. This was because I poured goo just enough to coat, around them. The ugly ducks finally turned out to be swans.!

The buns that I baked in 8'x8' pan, top bits were a bit soggy. The dough texture however was very impressive. I would say ‘extraordinary’ soft , light and fluffy. It is worth all the effort and the messy (goo) that I need to clean up . I took a bite and I thought it made my day. So I took the second one....(on and on). Before I munched them all up, I decided to put it down and finally finish some photo shoots.

Then, I was thinking about the last 2 tablespoon of flour that I added in later stage of kneading. Um...may be it was just small amount and didn't ruin the rest of the texture. Maybe?

The goo is just lovely, it gives milky aroma. I added a pinch of salt by the way. My Chinese colleagues said it’s totally too sweet. They had it cold the next morning i.e. took right out of the fridge, and told me the texture was good. It is so wrong that they had it cold, don't you think?

Some notes on the goo :
- It makes the bun soggy. Not sure what have gone wrong. Next time I will spread just enough to brown the bun. Think we can always put some more on top of finished product.
- It is too sweet for Asian taste, perhaps. But I think I am totally fine with it as is.
- I may experiment replacing butter with cream. But probably need to reduce further until it becomes very thick.

The sticky bun is addictive especially when it was warm. I could not put it down after the photo shoot. Best is to walk away. Well, there is nothing wrong with occasionally enjoying some indulgence as long as you don't go overboard. Moderation is what you need to repeatedly whisper to yourself.
To do after munching the second bun, sign up for half marathon in December. Yes! run baby run, baby run...n.

Saturday, July 18, 2009

Mini Tart - Fresh Blueberries


I have to say big thanks to Mr.Art who showed me the techniques and a step-by-step of how proper tart shells are made. The method he demonstrated was an original way using pastry blender. But those who has problem with cutting ice cold / hard butter into flour, food processor could be a really big help.

I did a little research on tart recipe with the same smearing technique. Some use whole eggs which I found out that the dough turn out to be too wet. Others use normal white sugar which does not provide neat final product as sugar does not dissolve and thus crystals appear on the tart shells.

Along my web-browsing, I came across a very nice and beautiful blog, Chocolate Shavings, who posted pretty photos of individual blueberry tarts. Thanks Chocolate Shavings for inspiration. I tried his pastries crème and it indeed is very mild and smooth. However, it did not set in the fridge and a bit too runny. So I did not use it finally.

Thanks Mr.Art again for tart shell recipes

Tart shells
400 g of all purpose flour
200 g of butter, cubed and chilled (or frozen)
60 g of icing sugar (Normal sugar is okay but you will see sugar bits in the final product)
2 egg yolks, lightly beaten
1/2 tsp of salt
1-2 tablespoon of very cold water (optional)

Be forewarned, this must be made in a cold cold and cold room. If your kitchen is warmer than 24 C, turn on the air-conditioner. If you don't have one installed, eh...I don't want to say this, but you can alter butter with other kinds of fat with higher melting point, like magarine. But of course, it doesn't taste as nice as butter.

Sift the flour, sugar and salt on in a chilled bowl, make a well. Put in the very cold butter. Incorporate butter into flour using pastry blades or pastry scraper until the dough clumps with the size of yellow splits peas, or even better, fine sand. You have to work quickly and ensure the butter does not melt. If it does, put the bowl in the freezer for 15 minutes and continue.

I prefer to use my tiny food processor that holds upto 2.5 cups of flour. It helps a lot especially if you are not ready to go physical with this task. I put 1/3 of flour mixture and 1/3 of butter and pulse for few seconds. Repeat for the rest.

Once the dough resembles small peas/sand, pour the flour on work surface, make a well in the center. Add eggs in the center; lightly fork around until dough comes together loosely. Then use both of your hand to form a pile of dough. If it seems to be too dry such that a portion of the ball falls apart, sprinkle 1 table spoon of very cold water, one at a time, until they come together. I would add probably up to, say, 2 tablespoons, not more than that. Or one might perfer, spray on the dough to distribute it evenly. But I wouldn't bother.
Smear the dough - From the top of the pile, use the heel of your hand, smear it out completely onto the counter surface. It should take a spoonful at a time. This process makes sure the butter is well incorporated into the flour and makes the dough easy to work with. Once done, put the dough together into ball, it should be smoother and more pliable. If you see butter chunks in the dough repeat the process. This can be done up to three times. For those who have warm hands, work quickly as we do not want butter to melt.

Form it into 2 balls and press down to form discs. Wrap with plastic wrap rest in the fridge for at least 1 hour.

Pastry crème
4 eggs
100g icing sugar
4 tbsp (40 g) all purpose flour
4 tbsp (32 g) corn flour
600 ml milk
a few drops of vanilla extract
a pinch of salt

Cream the eggs and sugar together until really thick and pale in color. Sift and beat in the flour and corn flour and a little cold milk to make a smooth paste. Heat the rest of the milk and salt in a sauce pan until almost boil and pour on egg mixture, whisk well all the time. Through sieve, return mixture to the sauce pan, discard the curd left on sieve. Stir over low heat until mixture starts to boil. If you are not quick enough, makes sure the heat is low or the curd will form up at the bottom/corner. I normally switch between whisk and spatula, to ensure I reach around the corner. Add vanilla extract to taste and cook further for a few minutes. The consistency should be a little thick just like that of pancake batter. Before putting off from heat, be sure to taste if the flour is cooked through. If it tastes a little grainy on your tongue, cook further and stir constantly for a few minutes.

Cover and allow to cool completely before filling in the tart shells.

Bake the tart shells

Take the dough from the fridge. If it appears to be too hard to roll out, leave it out for a few minutes. Or massage it on the board with rolling pin. I read on a Recipezaar that someone actually shaves pie dough on the tart pan and press it on. Quite an interesting technique but I have never tried that as yet. Roll out the dough on a lightly-floured parchment paper. Press the rolling pin on the dough, start from the center. The idea is to spread out from the center, then extend to the edges

Do not worry if edges are thick and ugly, we will get there later. For me, the dough was really difficult to roll when it was cold; I pressed the center down, just to ensure I did not have to squeeze it out in later rolling. Then turn the dough less than a quarter, repeat rolling from the center. Again do not bother if you don't yet reach the edge. If needed, lightly flour the work surface on the dough if the it seems to stick to parchment paper or to rolling pin. Once roll for about 4-5 turns, roll from center to the edge. Turn the dough while you roll. Repeat until it the dough is about 1/8 inch thick.

Consistency check – cut through the edge with pizza cutter and check if there are any spots thicker than others. If there are, roll to spread out dough evenly.

Use cookie cutter to cut to desire size that fits individual molds/tart pans. Place the dough on molds loosely. With unused dough tapped with flour, press the dough against the mold. Use knife, slash out unwanted dough on the edge. Prick bottom of the dough with a fork a couple times. Place a small parchment paper (a little bigger than the mold) in the center of the dough and weight down with beans. Bake blind for 10-12 minutes or until golden brown. When the shells are firm to touch, and turn golden pale yellow, remove parchment paper and beans. Continue baking around 2-3 minutes more to let inner shell dry out. Allow to cool completely before put in fillings.

Topping
Fresh blueberries
Jam of your choice.

Microwave jam in medium heat until just melt, press it through sieve. Letcool until warm to touch. Toss 1 tablespoon of jam with 1 cup of blueberry to coat. Set aside or wrap with plastic in the fridge.

Final assembly
Fill in 2/3 of tart shell with paster creme. Chill for a few hours. Do not place the blueberries right away or they may sink to the bottom. When ready to serve, put blueberry on top.

Ideas for decoration – garnish with little mint leaves or curls of orange zest on top.

enjoy !

Monday, May 25, 2009

Caramel Custard Cake


If custard cake to be displayed among other moussy creamy chocolaty cakes, it may not get our attention. Little had we known that one little fine jewel is sitting…. shining right there. The caramel cake, whether or not it glows out of display, it deserves our bites. As I recall, I never bought home this goodie. But once I tried, I was hooked. Believe me, it make you sing in the shower.

I lost the recipes a while back. So, this time I looked up custard recipe from the Internet, scaled down sugar and paired it with my favorite chiffon cake recipe. Here is how.

Caramelized sugar

½ C of sugar

Pour sugar in 9” cake pan set over medium-low heat. Sugar crystals should start to dissolve slowly. Keep close eyes on, as it tends to burn easily. Remove from heat, when it turns yellow. Tilt the pan back and forth to ensure it was browned evenly. The goal is to obtain dark mahogany color. I personally like it dark brown because it will be a bit paler when baked and melted later on. Stir with tooth pick occasionally if you see any spots darker than others. Remove from heat immediately if it starts to bubbling and turn light brown. Swirl the pan to level out caramel. Set aside.

Do: Pyrex glass pan is a good use, make sure the type you use is direct-heat resistant. The pan should be at least 2-inch high.

Don’t: use bottom-removable pan as the batter will leak in the oven. Non stick or Teflon is not a good idea, as dark color pan wont' allow you to see the color of caramel if it is ready or not.

Turn on the oven 330 F. Position the rack at the lower third. Put in a 12x12x1.5 inch tray half-filled with hot water.

Custard

2 cups unsweetened condense milk (or fresh milk)
1 tsp vanilla
2 yolks
2 eggs
1/3 cups of sugar
1/8 tsp of salt or a pinch

Beat yolks and eggs in the bowl, set aside. In a medium sauce pan , put milk sugar and salt over low heat, stir until sugar dissolves. Through sieve, pour milk ingredient over eggs mixture, whisk constantly for a few minutes. Stir in vanilla. Set aside.

Chiffon cake
(A) – sift together these ingredients.
1 cups (scoop out 1 tbsp) of all-purpose flour
½ tbsp baking powder
½ tsp salt

(B) –In a big bowl, beat yolks and sugar until pale and creamy. Most chiffon recipe allows you to beat flour, yolks, oil and milk together, I never tried that. It gives me peace of mind if I cream the yolk first so that I ensure that sugar crystal dissolves and the yolks are airy.

4 yolks
¼ cups of sugar

(C) – mix together the following liquid ingredient. Gently stir liquid in yolk ingredients, mix well. Set aside.
½ tsp vanilla
¼ cups of vegetable oil
½ cups of milk

(D) Beat egg whites until foamy. Gradually add sugar , 1 tbsp at a time, beat well each addition. Add crème of tartar. Whisk well unit it reaches soft peaks. Oh again, I forgot to take photo of my soft peaked whities..! And while you are whisking the whites you will hear cracking noise from the pan as caramel hardens.

4 egg whites
¼ cups of sugar
¼ tsp of lemon juice or vinegar (I used 1/8 tsp crème of tartar)

Add flour into egg-milk mixture into 4-5 batches, alternate with whipped whites. I used whisked to 'cut-thru' the flour first, ensure all the lumps break up and well-mixed into runny liquid ingredients. When the batter gets thicker (thick enough to fold), switched to spatula and added 1/3 whites. “Fold in” remaining flour and whites gently while rotating the bowl. It’s a good idea to fold from bottom to make sure no lump ingredients left unmixed. Set aside.

Through sieve, pour custard ingredients on hardened caramel. Then, pour batter over custard gently and evenly. Don’t worry if it seems to sink into milk mixture. It will spring back up in the oven. Now the 9" cake pan is filled with all the liquid and batter. Be very careful when place it on tray with half water. The water in tray should be hot and steamy.

Bake for 45-60 minute. This cake is better slightly over-baked than under-baked. Be warned, if custard layer is not fully cooked …… everything goes to the bin.

Check point: at 45 minutes, jiggle the top of cake with you hand. if it seems to be wobbly inside, continue to bake for 10 minutes. Cover the top with foil or baking paper if it is browning on the top. Repeat the test after ten minutes.

Once done, remove from oven and wait until it completely cools. Do not flip when it is hot as custard needs to be set in its container.

Tips: Once remove from oven, don’t cut across the edge otherwise melted caramel will leak to the side which will discolor custard and over-soak chiffon layer.


I rest the pan in the fridge for 2-3 hours until it completely set before I invert to serve. Before invert, dip the pan in a bowl of very hot water for 30 seconds. If you notice the cake does not shrink from the side, run the knife around to loosen it from the pan. Keep in mind you just want to free up the cake, don't run it all the way through custard layer or it won' t have a nice clean cut.

Left over melted caramel that dripping off is good as sauce, dont' wasted it. This cake is best eaten cold.

Tuesday, May 12, 2009

Variation of Flourless Chocolate Cake


This is one of variations you can play around with Flourless Chocolate Cake. The cake actually looks handsome when naked, without topping, with cracky crusty look. However, this would give more creamy texture. And , if you happen to misshape the cake during the process, cover it up with whipped creme would be a quick fix.

See how gooey it is inside?


The one is my all time favorite, you can find cake recipe over here. For the whipping cream, you can use Cool Whip or the following.

1 teaspoon gelatin bloomed in 2 tbsp cold whipping creme for 10 minutes
2 cups of whipping creme
1 tbsp icing sugar
1/2 tsp vanilla extract


Once gelatin is bloomed, melt over low heat, until completely dissolved, don't bring to a boil. Let cool at room temperature. Set aside.

Pour cream into the chilled bowl and whip it vigorously until it just begins to hold its shape. Add about 1/2 teaspoon vanilla extract and 1 tablespoon icing sugar, and continue to whip until it holds very soft, peaks. Drizzle cooled gelatin all at once to cream during whipping. Stop whipping when it forms soft peaks. Use immediately.

Friday, May 8, 2009

Butter cookies-sables à la poche-sand in your pocket

I always call them butter cookies. Apologies for the love of convenience. I recall a few years back I received a big bag of these for New Year gift. It was so rich and was really really and really hard-to-put-down. The whole family loved it and we finished a 2-pound bag in only a few days. I used to have the recipe with egg yolks but again…. I lost it. The problem back then when making this cookies was that the dough tended to melt very fast while piping. The hot/humid weather in Bangkok was to blame. I found a recipe using egg white and strong bread flour that caught my interest. I doubted how bread flour would help with piping. Here is what Apple Pie Patis Pate quoted in this web site “…..The sandy texture reminiscent of shortbread is achieved through the use of small amounts of liquid and sugar to minimize gluten development. The spread is also limited through the use of strong bread flour, allowing the piped cookies to hold the star tip pattern during baking….”. Genius huh !!! The recipe below is from Apple Pie Patis Pate who adapted it from Michel Suas’ Advanced Bread and Pastry. What I did differently was adding a few drops of vanilla extract and decorated with chopped dried cranberries. For the wet ingredients:

12 ounces / 340 grams butter, at room temperature
4 + 1/2 ounces / 128 grams powdered sugar
1 +3/4 ounces / 50 grams egg whites
a few drops of vanilla extract
For the dry ingredients:
1 teaspoon ground cinnamon (I omitted this)
13+ 3/8 ounces / 380 grams bread flour
2/3 teaspoon baking powder
1 teaspoon salt
For decoration
Dry cranberries , chopped
Sift the dry ingredients together and set aside. Cream the butter until pale and cramy then mix in the powdered sugar. Add the egg whites and vanilla extract slowly and mix until thoroughly incorporated.
Add the sifted dry ingredients to the wet ingredients. Mix just until thoroughly incorporated, take care not to over-mix. Use a pastry bag with a large star tip, pipe into 1 1/2 inch wide mounds.
I decorated each cookies with dried cranberries.
  
Bake the piped cookies at 325ºF for 15 minutes, or until lightly golden and well-browned on the edges.

Sunday, April 19, 2009

Orange cake


I was obsessed with chocolate cake for while. Now it is time for light and fruity dessert. This one is really refreshing. It is also guilt-free as low in fat content.


Sponge cake (I use 7-inch oval-shaped non stick pan)

50 g of cake flour
a pinch of salt
2 eggs
50 g of sugar
3 g of melted butter, warmed at room temperature (you can omit this, but for me it really makes difference)

Sift flour and salt, set aside.

Beat eggs and sugar until creamy/foamy and pale. Add butter, I don't directly pour melted butter as it will end up sinking to the bottom of the bowl. I scooped out 2 tablespoon of batter and whisk in butter, incorporate them well.
Then pour it back into egg mixture, fold in gently about 3-4 times, Don't over work. Sift in flour, in 3 portions, fold from the bottom to the top by moving spatua along the side of bowl. I do this from left side and alternate with the right. Rotate the bowl as you go. Some may suggest to use spatula cut in the middle of bowl and scoop up along the sides which is one of many's most favorite folding method. I found out that it tends to deflate the volume. You may try out a few times which technique suits you most.
Continue on....the batter will deflate a little, don't panic. Continue to fold from edge of bowl, while rotating. Make sure no lumps of flour left. Again, do not over work. Making basic sponge is not as simple as it appears. Believe me, this is just the matter of practice. After countless of disasters in the past i.e. lumps of flour all over the cake, I finally did it right.


Bake at 175 C for 15 min or until toothpick inserted in the center comes out clean.


Wait until it completely cool. The cake will shrink from the side. Cool on the rack. Cut by half and apply jam of your choice. I used raspberry jam.


Orange glaze

150 g of water
50 g of concentrated orange juice (I used sunquick)
12 g of cornstarch
1 tbsp of sugar
a pinch of salt
10 g of butter

On low heat, put everything in a pot except butter. Stir constantly for 5-8 minutes. When the mixture is heated up, you need to stir more quickly to prevent the curd at the bottom, or remove the pot away from heat. I finished mine in 15 minute, on very low heat. The consistency should be thick, honey-liked. Stir in butter and stir well. Pour on the cake immediately as it will set at room temperature.

If the glaze is thick, you can set over very low heat and stir until it reaches pouring consistency. I actually waited until it was very thick and pour on cake in one go, with one direction. If you pour back and forth, it may leave ribbon trail or bumpy look which is not desirable.


I sliced in pieces, using serrated knife and here it is. For clean cut, clean the knife after each cut with clean towel.


Sunday, April 12, 2009

Nectarine Strusel Upside Down Cake

What would you do if you cannot sleep at night? watching TV? reading?

Last week, I read a cook book at 10 pm. And as usual, instead of putting me back to sleeping mode, it woke me up. I wanted to strap on apron right after I read through the paragraph how streusel was baked. My CPU inside my head started to revolve at 65536 rounds per second. I bet, if there is 24-7 supermarket opened, I would have run out to buy 4 nectarines and eggs which I used up a few days ago.

The cake, baked with 10-inch pan, is big enough to serve 10 people i.e. one piece for each. But if your guests are sweet-toothers, you may need to sacrifice your portion. The cake is meant to be basin-liked, slope towards the center, which is how nectarines were arranged. The surface was pretty with the nactarin pattern, browned by butter and sugar. It was nice...just nice. I know if this is put for sale it may not look very attractive, but as I made this out of scratch, some how I managed to see it as a a rustic beauty.

The recipe also allows apples or bananas if nectarines are not available in your area or if they are not in the season. I love nectarines though. Their sourness goes really well with the cake. The streusels in the center are chewy and crumble. My only complain to this is that I prefer thicker cake batter layers.


I suggest you to bake streusel first as it needs to be cooled down completely before use.

Below is streusel recipe. I actually “doubled” these up as you can see thick streusel in my photos. You may stick to the original portion and see if you like it.

1/4 cup of almonds, chopped
1/3 cup of all-purpose flour
1/4 cup of (packed) dark brown sugar
1 tsp of cinnamon1 tsp of ginger
1/2 stick (2 oz) of unsalted butter , cut into small pieces
1/2 cups of rolled oats (not instant)


Turn oven to 350 F. Toast chopped almond until golden brown. Mix flour and cubed butter with forks until resembles crumbs. Add brown sugar, nuts , cinnamon and ginger, toss a few times to mix in. Spread unbaked streusel onto the largest tray so that it won’t pile up and is cooked through easily.

Bake the streusel for 10-15 min 350 F stirring into piece after it slightly cool down


Topping:

1/2 stick (2 oz) unsalted butter, melted
1 cup (packed) dark brown sugar
3-4 ripe medium nectarines , each cut into 8 pieces

Center a rack in the oven and preheat the oven to 350 F.


Pour melted butter over bottom of 10-inch pan wrapped with foil at the bottom (to prevent leaks). Sprinkle brown sugar evenly and arrange nectarines as shown in the photo. You can arrange clockwise and the other row as counter clockwise. Set this aside and prepare the cake.

The sponge:
1 cup of all-purpose flour
1 tsp of baking powder
1 tsp of baking soda
1/4 tsp of salt (or 1/8 tsp of table salt, don't even think about omitting this tiny portion)
4 egg yolks
6 egg-whites
1 1/2 cup of sugar
1/2 cup vegetable oil
1/2 cup of fresh lemon juice

Sift flour, baking powder and baking soda together

Beat half of sugar, salt and yolks until pale and creamy, then whisk in vegetable oil and lemon juice (I actually replaced with concentrated orange juice and cut down sugar by ¼ cup). Do it gently but quickly until no oil streaks left. Don’t worry if the batter deflates. The recipe actually instruct to mix in 1 cup of flour into the yolk mixture but I think that would dense the batter so I fold in only 1/3 cup of flour then I turned to beat egg whites.

Beat egg white until fluffy, add a 2-3 table spoons of sugar, and continue beating. Gradually add sugar as you whisk. The whites should form light-foamy stiff/ shiny peak when it is ready to use. I whisked by hand and it took around 8 minutes.

Add 1/3 of egg white mixture into yolk mixtures; fold from the bottom of the blow with spatula quickly but gently. Do this in different directions such that you flip the batter up from left and next you fold and flip it up from the right. After adding the whites, batter will be runnier and ready for more flour. Fold in 1/3 cup of flour. Alternate between flour and egg whites in 3 batches until both ingredients are used up. Ensure there are no lumps left.

Pour half of batter onto arranged nectarine. Use spatula to spread out to cover fruit base. Sprinkle streusel evenly to make layers. Pour the rest of batter on top of streusel. Use spatula to spread evenly. I was tempted to cover up all the fruit so I mistakenly over poured the first batch and I almost had too little on the top to cover streusel. Don’t make the same mistake as I did.

Bake at 350 F, for 45-50 minutes or until golden brown and a toothpick inserted in the center comes out clean. My cake browned quickly during the first 15 minutes (I wondered !!!), so I covered with waxed paper. It didn't help much and was and burning. Oh my gosh, I was devastated. I put a disc from removable pie pan onto the wax paper. Fortunately, at that time the cake was firm enough to hold the metal disc. And of course it stopped browning. phew...w..w..w.

Once done, be sure not to flip the pan right after or the topping will slide down. Let it set in the pan until warm to touch or until completely cool. The cake will shrink from the sides. I flipped it over when it was still warm. I was excited as I am always nervous when cooking with fresh fruits. What a pretty surface it had, I murmured to myself.

I leave the cake on the counter top for a few hours and it dries out a little. So, I put gelatin glace on it.

1 tsp of gelatin plus 30 g of cold water, let it blooms for 5-10 minutes.
30 g hot water, not boiling.

I let gelatin blooms in cold water then added hot water, stir well. Let it sit over the counter (room temp was around 15 C). When it started to form up as half jelly half liquid, with rubber brush, touch up nectarine surface. Let it cool in the fridge before slice.


The cake is best served the first 2 days it is made. Of course, with a scoop of vanilla ice-cream (imagine me running to the near-by Häagen-Dazs) The streusel filling was scrumptious. I will definitely make this again ! (soon!)