Showing posts with label pie. Show all posts

Saturday, July 18, 2009

Mini Tart - Fresh Blueberries


I have to say big thanks to Mr.Art who showed me the techniques and a step-by-step of how proper tart shells are made. The method he demonstrated was an original way using pastry blender. But those who has problem with cutting ice cold / hard butter into flour, food processor could be a really big help.

I did a little research on tart recipe with the same smearing technique. Some use whole eggs which I found out that the dough turn out to be too wet. Others use normal white sugar which does not provide neat final product as sugar does not dissolve and thus crystals appear on the tart shells.

Along my web-browsing, I came across a very nice and beautiful blog, Chocolate Shavings, who posted pretty photos of individual blueberry tarts. Thanks Chocolate Shavings for inspiration. I tried his pastries crème and it indeed is very mild and smooth. However, it did not set in the fridge and a bit too runny. So I did not use it finally.

Thanks Mr.Art again for tart shell recipes

Tart shells
400 g of all purpose flour
200 g of butter, cubed and chilled (or frozen)
60 g of icing sugar (Normal sugar is okay but you will see sugar bits in the final product)
2 egg yolks, lightly beaten
1/2 tsp of salt
1-2 tablespoon of very cold water (optional)

Be forewarned, this must be made in a cold cold and cold room. If your kitchen is warmer than 24 C, turn on the air-conditioner. If you don't have one installed, eh...I don't want to say this, but you can alter butter with other kinds of fat with higher melting point, like magarine. But of course, it doesn't taste as nice as butter.

Sift the flour, sugar and salt on in a chilled bowl, make a well. Put in the very cold butter. Incorporate butter into flour using pastry blades or pastry scraper until the dough clumps with the size of yellow splits peas, or even better, fine sand. You have to work quickly and ensure the butter does not melt. If it does, put the bowl in the freezer for 15 minutes and continue.

I prefer to use my tiny food processor that holds upto 2.5 cups of flour. It helps a lot especially if you are not ready to go physical with this task. I put 1/3 of flour mixture and 1/3 of butter and pulse for few seconds. Repeat for the rest.

Once the dough resembles small peas/sand, pour the flour on work surface, make a well in the center. Add eggs in the center; lightly fork around until dough comes together loosely. Then use both of your hand to form a pile of dough. If it seems to be too dry such that a portion of the ball falls apart, sprinkle 1 table spoon of very cold water, one at a time, until they come together. I would add probably up to, say, 2 tablespoons, not more than that. Or one might perfer, spray on the dough to distribute it evenly. But I wouldn't bother.
Smear the dough - From the top of the pile, use the heel of your hand, smear it out completely onto the counter surface. It should take a spoonful at a time. This process makes sure the butter is well incorporated into the flour and makes the dough easy to work with. Once done, put the dough together into ball, it should be smoother and more pliable. If you see butter chunks in the dough repeat the process. This can be done up to three times. For those who have warm hands, work quickly as we do not want butter to melt.

Form it into 2 balls and press down to form discs. Wrap with plastic wrap rest in the fridge for at least 1 hour.

Pastry crème
4 eggs
100g icing sugar
4 tbsp (40 g) all purpose flour
4 tbsp (32 g) corn flour
600 ml milk
a few drops of vanilla extract
a pinch of salt

Cream the eggs and sugar together until really thick and pale in color. Sift and beat in the flour and corn flour and a little cold milk to make a smooth paste. Heat the rest of the milk and salt in a sauce pan until almost boil and pour on egg mixture, whisk well all the time. Through sieve, return mixture to the sauce pan, discard the curd left on sieve. Stir over low heat until mixture starts to boil. If you are not quick enough, makes sure the heat is low or the curd will form up at the bottom/corner. I normally switch between whisk and spatula, to ensure I reach around the corner. Add vanilla extract to taste and cook further for a few minutes. The consistency should be a little thick just like that of pancake batter. Before putting off from heat, be sure to taste if the flour is cooked through. If it tastes a little grainy on your tongue, cook further and stir constantly for a few minutes.

Cover and allow to cool completely before filling in the tart shells.

Bake the tart shells

Take the dough from the fridge. If it appears to be too hard to roll out, leave it out for a few minutes. Or massage it on the board with rolling pin. I read on a Recipezaar that someone actually shaves pie dough on the tart pan and press it on. Quite an interesting technique but I have never tried that as yet. Roll out the dough on a lightly-floured parchment paper. Press the rolling pin on the dough, start from the center. The idea is to spread out from the center, then extend to the edges

Do not worry if edges are thick and ugly, we will get there later. For me, the dough was really difficult to roll when it was cold; I pressed the center down, just to ensure I did not have to squeeze it out in later rolling. Then turn the dough less than a quarter, repeat rolling from the center. Again do not bother if you don't yet reach the edge. If needed, lightly flour the work surface on the dough if the it seems to stick to parchment paper or to rolling pin. Once roll for about 4-5 turns, roll from center to the edge. Turn the dough while you roll. Repeat until it the dough is about 1/8 inch thick.

Consistency check – cut through the edge with pizza cutter and check if there are any spots thicker than others. If there are, roll to spread out dough evenly.

Use cookie cutter to cut to desire size that fits individual molds/tart pans. Place the dough on molds loosely. With unused dough tapped with flour, press the dough against the mold. Use knife, slash out unwanted dough on the edge. Prick bottom of the dough with a fork a couple times. Place a small parchment paper (a little bigger than the mold) in the center of the dough and weight down with beans. Bake blind for 10-12 minutes or until golden brown. When the shells are firm to touch, and turn golden pale yellow, remove parchment paper and beans. Continue baking around 2-3 minutes more to let inner shell dry out. Allow to cool completely before put in fillings.

Topping
Fresh blueberries
Jam of your choice.

Microwave jam in medium heat until just melt, press it through sieve. Letcool until warm to touch. Toss 1 tablespoon of jam with 1 cup of blueberry to coat. Set aside or wrap with plastic in the fridge.

Final assembly
Fill in 2/3 of tart shell with paster creme. Chill for a few hours. Do not place the blueberries right away or they may sink to the bottom. When ready to serve, put blueberry on top.

Ideas for decoration – garnish with little mint leaves or curls of orange zest on top.

enjoy !

Friday, March 13, 2009

Cherry Cream Cheese Pie

When I was in college, I recalled my Sunday mornings started with a 4k jog. You know, every girls want to get tiny, including me. What I did after the regular jog was irregular. I drove to my favorite bakery house and had a piece of blueberry cream cheese pie. Oh no, don't judge me as yet, until you try this. Don't' ask me if I succeeded in getting slim. Well, I was not in a bad shape after all.
Prep time: 1hr and 2-3 hr to chill

Pie base
200 g graham cracker or cookie crumb
100 g butter, soften or melt it in to room temp liquid.

Filling
250 g cream cheese, room temperature (I use Philadelphia, don’t use low-fat)
200 g sweetened condensed milk
75 g lime juice

Topping- 1 can of cherry filling. (I used up 350 g for topping)

9-inch removable pie pan or disposable foil pan


Put crackers in electric mixer, pulse until become fine crumbs or until sandy, set aside in a medium bowl. Soften butter in microwave under medium heat. It is okay if it melts, but try not to over heat it. Pour butter on the cracker crumbs, mix with spatula or if you don’t mid getting your hand greasy, feel free to play with it. Mix these thoroughly, ensure no big chunk of butter left.

Now, grab about ¼ cup of the mixture, squeeze it lightly in your palm and see if it holds together nicely. If not, add 10 g-15 g of melted butter. The ratio of butter: cracker I have here yields pretty good base. But again, it depends on crackers available in your neighborhood, if they have low fat content, you may add more butter. However, I find out that more is better than less. Imagine when you cut the pie and that the base falls apart in crumbs, that wouldn’t look very nice huh?


Press crackers in removable pie pan. I prefer to press firmly against bottom and sides. In a 9 inch pan, pie crust will be 0.5 cm thick and the sides are 1 cm high. If you use 8-inch pan, you’ll have a little thicker crust. Wrap with plastic and rest in fried until firm, around 1-2 hours.

Filling – I use Philadelphia cream cheese. which comes in a 250 g bar. Once, I tried the low-fat version. It turned out cream cheese batter was too runny. And no matter how long I refrigerated it, it was not firmed and could not hold the topping. Meaning?….cherry sank to the bottom and create bruise -looking pie.....which suits for Halloween.


Before you beat cream cheese, ensure it is soft enough to twist. I usually bring it out directly from the fridge and warm in microwave under low heat for 1 minute. I mixed with hand mixer for about 10 minutes until fluffy. Add sweetened condensed milk. Beat until well blend. Scrape the side and bottom of the bowl. Continue beating until there are no lumps.


Gradually add lime juice. My advice for those who don’t like sour taste is to add half portion, beat until just well blend and taste. For me, I would go for the whole 75 g (4 limes). I love tanginess. It goes so well with mild sweet cherry topping. So I didn’t scale back the lime. Note also that the sourness varies with seasons and locations. I made this a few times and it is difficult to keep it tastes the same every time. For me, I just trust my tongue, mix-in ¾ lime juices, then taste, and gradually add juice depends on my mood at the moment.


Pour cream cheese batter in prepared pie crust, chill until firm, preferably 2-4 hr. It is important to let it completely set in fridge, otherwise it won’t be able to hold cherry topping.


A few hours later, lay cherry topping softly and evenly. Refrigerate until serve.

This goody can be made one day ahead.

Cut into 10 pieces : 330 calories per serving . Meaning, my 4 k run is pretty much to make room for a small piece of pie....which is .......WORTH IT!

Sunday, February 8, 2009

Chocolate Pistachio Shortbread


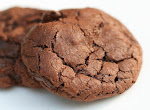
Another can't-put-down goodie from Cook Illustrated. Raise your hands if you are addicted to afternoon biscuits.

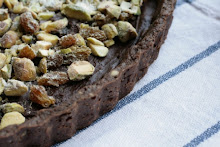
The Chocolate Shortbread is bitter and cookie-liked. I baked blind until the dough was firm to touch. Then, let cool for a while, poured melted semi-sweet chocolate and topped with chopped pitachios and raisins.

This one is good in bite-size as well. Next time I'll cut it when warm as it broke up in pieces when I cut them when completely set.


For final touch, splash with white chocolate or caramel trails which also helps keep nuts and raisins in place. Well, for me, maybe not, I like it bitter this way.


I have just now realized, while I'm posting this in internet cafe (as I'm away from home), I'm missing my buddy, a small / huggable oven in my shanghai apartment. Poor me, I miss baking, kneading dough. I wonder , what I am becoming ?

Thursday, December 18, 2008

Chez Panisse Almond Tart


I need to confess. I misspelled Chez Panisse, for a few times before I got it right.

David described the famous tart in his website. While reading, my mind was wandering, sitting at the patio, fork-digging the tart...then the fork bent (as David mentioned, this pie was removed from the menu as customers complained they had trouble eating it with fork), I then use my hand grabbed it up...put it my mouth...chew...w...w. Okay, wake up to reality. I was inspired, it was time to strap on the apron.


I agree with David, this one is a bit tricky (and sticky). I would really really and really love to make it again, but...(yes, there is a but) I will need to stand in front of the oven at all times. You'll see why.
Find the recipe here

The crust was easy to make. The dough I made was not as soft as David's. I prefer to make it dryer as easier to handle that way.

Once finished rubbing butter into flour, I added water by spraying water into the flour(instead of pour 1tbsp directly into the bowl as I found it is almost impossible to get all bits well-combined with 1 pour of tiny amount of water). While spraying, toss the bowl to dampen dry crumbs.


Talking about spraying, I counted how many times I sprayed into the bowl, how many strokes would turn crumbs into dough. It counted 75. -_- I intended to measure ….75 puffs was equal to how many tablespoon or water(?) . I know, I got my agenda. The day passed by, I forgot to do this. Then My sub-consciousness reminded me, in my dream that I needed to do this first thing in the morning. So next morning, I did. [Are you envisioning me, getting up in the morning, running in PJ , crazily puffing water into a tiny tablespoon? My neighbor might have seen me , which explains why they looked at me in a odd way.

[now go back to procedures.]

I stopped spraying when the crumbs held together when I squeezed them in my palm. I think I used more than 1 tbps of water as directed. I was surprised though that unbaked dough came out drier than expected. May be the humidity was low? See below, humidity in my kitchen was only 30'ish (in summer it was 70'ish, and FYI, in Bangkok it was 80'ish in a non-rainy day).


I poured the dough on the working space, as the rule of thumps in making pie, I didn't knead. I wrapped the dough and it went directly outside the window. No, I dint’ throw away, I just rest the dough in a cold place. Outside was colder than the fridge. I set alarm clock not to forget it there, an hour later, before I went shopping.

Can I confess one more thing? I used bread flour instead of all-purpose flour. I have a (lame) excuse; bread flour is a lot easier to buy (here in shanghai) and a lot cheaper. I did try to source cake flour produced locally. No luck. Bread flour should be okay, I thought. I barely kneaded it, plus there was very little liquid in the dough, I was just crossing my fingers that gluten wouldn’t develop. And I’m glad it came out okay.


After I came back from shopping (gee, it was cold out there. I couldn't feel if my ears were still attached to my face. Especially, after an old guy pointed at me...gossipped with his grandson at the mall, maybe my ears fell off the ground !?). I checked myself in mirror and I looked fine (and pretty). So, I strapped on an apron and started to roll the dough.


The dough was easy to handle. I pressed the dough up to fully cover the side. Once done, I chilled the pan for half an hour. Put it out, slid inside the oven and baked blind. After 15 min, the side of the dough shrank quite a bit !!! I kind of expected this but...oh gee, please don't shink further. I wanted to decored it up to the edge, made it nice...but boyd, the oven was hot! So, I just hoped that it left some edge for me enough to hold the filling.

While baking pie shell, I made filling, which is super easy. But hold on, once you pour the filling and start baking....someone got to do the dirty job.


In the oven, once the filling started to bubbled...I smoothed it out to prevent ugly top as described in David's website. It was not easy but it is a must. And when you open oven door frequently, temperature was , I think, a bit difficult to control.


And this was when I think how baking new recipe is interesting. There are a few factors out of control. Sometimes I just scream when things went wrong in the midst.


And , I found it very difficult to make top crust as nice the original. Eventhough this was a pain, I made this twice with in twon weeks. It was a big hit , maybe my (male) colleagues love something crunchy ? I myself like it very mooch (much) too. I will definitely make this again.


Thanks again David.

Note: David Lebovitz is my latest culinary hero, besides Alton Brown. :-D

Monday, December 15, 2008

Miniature Cream Scones (Gourmet Magazine, March 1990)


Before I gave up, I had to finish this business, baking scones. The first time after two scones-disasters, I finally got nice, light, buttery, flaky scones. Thanks Epicurious for publishing this recipe (it was first published in Gourmet magazine , March 1990).

Ingredients

1/2 C of heavy cream plus additional for brushing the scones (I use egg+1tbsp of milk for brushing)

1 large egg
1 tsp vanilla extract
3 tbsp of sugar plus additional for sprinkling the scone
2 1/4 C of cake flour
1/2 tsp of salt
1 tbsp (or 3 tsp) of double acting baking powder
1/2 tsp of baking soda.
3/4 stick (6 tablespoons or 90 g) of cold unsalted butter, chopped into tiny bits.
1/2 C of dried currants (I used dark raisins)


In a bowl, whisk together 1/2 C of cream, egg , vanilla and 3 tablespoon of sugar until they combine well. I warmed up cream in microwave so that sugar dissolved easier. In another bowl sift all dry ingredients. I sifted twice so that wet ingredients can soak in quicker.


Now the key procedure, working with butter. I don't have food processor. And I cannot work with my bare hands as they are too warm to smash the butter directly into flour. The bottom line we want is coarse crumbs of flour+butter with the size of small tiny peas. My method is to chop up butter into little pieces, as if you are chopping onion for stir fry (some people use cheese grater, but butter must be freezing cold enough to grate) . No surprise, butter will stick to blade and chopping board, so sprinkle sifted flour, set aside in the bowl, would be a good idea. Once chopped, my butter cubes are just as small as 2 x 2 millimetres (oh yeah, they were that small). Feel free to sprinkle more flour while chopping as these will be all scooped back to the bowl. Once done , in the bowl, use pastry blade to cut in butter and flour mixture to coarse crumbs. This process should be quick as the butter cubes are very very tiny and they incorporate into the flour in shorter time. Be careful not to let butter metl, especially if your kitchen temperature is warmer than 25 C . Luckily, my kitchen was freezing cold, 12 C (imagine next week is Christmas !).


Warm up the oven to 200 C. Put the tray in the middle of the rack, no need to grease the tray.
With the fork, stir wet ingredients into the dry, slowly mix in. Don't over stir. How ? pause every 3-4 strokes and let the wets soak in. You'll see that once you pause, flour absorbs humidity around them and becomes lumbs. Continue stiromg, just until combine. Add raisins or other dried fruits of you choice. Some part of the dough will look a bit sandy or dry, that is okay.


On a lightly flour surface , knead the flour for 30 second , approximately 20 strokes, not more than that. I am a gluten nerd, I would do anything to prevent gluten formation as I don't think anyone likes chewy scones. (right ? right?)

Pat down the dough, roll into ½ inch thick. Make sure you roll it evenly; otherwise, the scone will be tilted when baked in the oven. Cut with cookie cutter, set aside. I used the 1.5 inch diameter cutter, yielded 9 scones.

On pre-heated tray, put scones next to each other, don’t leave spaces. Putting them shoulder-to shoulder will help them rise better (crowd them so they have no choice but to sit straight!) Some website suggests to thumb-press on top of scones to prevent domed structure. I didn’t do that, I forgot.

You can brush with cream as advises in the recipe. I brushed with egg, lightly beaten with 1 tbsp of milk. Be careful not to brush on the side as it prevents the edge to rise. Bake for 15-18 minutes or until brown.

Got Tea?

Friday, December 5, 2008

Chewy-after-one-week Brownie


I am not sure if I want to blog about this. Anyone who are big fan of Cooks Illustrated magazine must stop reading now. I mean it….NOW. Or please, navigate away from this page. Cooks Illustrated is an outstanding magazine. Well-described and detailed instruction turn easy-to-go-wrong recipes into fool-proof ones. But, for this brownie, they don't get my brownie points. I don't hate it but this is just not my favorite. I wonder what in the world would/could/should have gone wrong. Let me tell you how I did on the first try.

I have to admit, my fault, I decided not to follow the process as directed. I beat the eggs..yeah I did...(stop screaming , okay? okay?) I know that's a no-no for making chewy fudgy brownie, but...but I just wondered if this could turn into a disaster. And yes, I got what I asked for, a disaster. The brownie came out cake-liked. It didn't hold together, let alone fudgy'ness. It melted 3 seconds right after reaching my tongue (well, If you could manage to pick it up gently with your fingers and successfully deliver to your mouth). Taste wise, dull. (now imagine, cook illustrated fans are stoning me to death). As I mentioned, it was my fault, I'm the culprit, okay? I won't beat the egg when making brownie again. I promise. After the first bite, the whole tray went directly to my Ziploc bags and to the fridge. My heart was broken and I need to be alone for a while.

I opened my fridge a few days later, ziploc bags were still there. I was greeting hello to my brownie and as if they said something like "Don't worry, I'm cool...I'm cool". Yes, of course, they'd been sitting in the fridge for a few days, must be cool. I wondered how bad/staled it was so I dragged them out and had a bite. It turned out I had quite a few bites as It was pleasantly chewy. Yes! chewiness I was after. It really was good in later days. Wait a minute, was I cheking the mole around the edges? Just kidding, they were no mold.

Then....I wanted to share them with my friends. But given it was a few days old, plus the appearance was not well-maintained on the first day, I'd better chewed it up by myself. Okie, the taste is okay and the texture is right after a few days. I marked my calendar for the second try.

After licking my wound and my fingers, I was ready to re-visit the recipe. Everything was done as instructed. I promised to myself I wouldn't beat the eggs again...my hope was restored up high that I would get fudgy brownie of my dream. I didn’t use Ghirardelli as recommended but used >50% bittersweet chocolate bar I could source in supermarket.

The verdict ? Those who are Cook’s illustrated regulars who ignored my warning above, please navigate away from my page otherwise be ready for my harassment. Ready? Steady? Go!. The taste was exactly the same as last time, DULL. Texture was disappointing. I used to have a chewier brownie which was cooked in microwave (Dah!). This batch, I baked at night and left it sat outside the oven til next morning and the texture was still cake-liked. It was not dry or anything , it just too easy to fall apart. You know what, it was quite similar to the first batch that I intentionally whisked eggs until fluffy.

Here is my second bake looks like.


I belived the recipe did a good job in putting my hopes way up high. The crust was nice and shiny. But the texture , may be my expecation was parred up to the moon, was disappointing.

So, what make it so fragile, I doubt if I should use bread flour so that gluten develops the bonding (or the chewiness)? Well, thinking about that I have a few other recipes to try. It is a bad idea to be persistent. My conclusion, although Cook’s Illustrated claimed they threw away > 50 pans of brownie before coming up with this recipe, I would not bother my third pan of brownie and try this recipe again.

Every dark brownies has its bright side too. As I mentioned above briefly, the brownies are so good after day 3…repeat….after day 3. For chewing monster, keep them in your fridge for one week in Ziploc. No kidding, no mole, if your fridge is not overcrowded and works properly. The taste and texture develops with the passage of time. The other good thing about is that it has low fat content in relative to other fudgy brownies recipes. (well, may be this is why it’s not as fudgy?) You can feel guilt free having a little square for afternoon snack.


A debate on brownies could be endless. It is just the matter of personal preference. Mine? combination of shiny crust, cookies-liked+fudgy, cocoa+coffee taste, + some nuts. Yours? For more debates on brownie, visit NY Times article.

For those who doubt my comment. I would recommend you to try this recipe and compare it with other brownies you have ever had. Let me know you feedback.

(source: Cook's Illustrated2008)

5 ounces semisweet chocolate or bittersweet chocolate, chopped
2 ounces unsweetened chocolate, chopped
8 tablespoons unsalted butter, cut into quarters (1 stick)
3 tablespoons cocoa powder
3 large eggs
1 1/4 cups granulated sugar
2 teaspoons vanilla extract
1/2 teaspoon table salt
1 cup unbleached all-purpose flour

Turn on the oven to 350 degrees. I used 8 inch square pan but the recipe calls for 7 inch. I believe the thickness in 8 inch one came out just fine. Melt chocolate and butter with low-med heat in microwave, stir frequently. Or, heat them over simmering water. Stir in cocoa powder. Set aside to cool.

Whisk together eggs, sugar, vanilla and salt in medium bowl until combine, about 15 second (wow...that precise !!! this is what was described in the recipe, but I think it largely depends on your hand speed. For me, I normally do 20-25 strokes within 15 seconds while my grandma would have only 5 strokes. Agree?). okay okay I understand...the idea is to blend them well...not whisk for the fluffiness.

Whisk warm chocolate mixture to egg mixture then stir in the flour with wooden spoon until just combine. Pour mixture into the pan, level surface with spatula. Bake 30 or 40 minute, I recommend you to check after 25 if you use 8 inch pan like me as the batter spread out thinner. This recipe should be under-baked as it tends to comes out too dry because the low fat percentage. The doneness is observed by , the brownie is slightly puffed and tooth pick inserted in the center comes out with small bits of crumbs.

Cut the brownie after it's completely cooled down unless you need warm brownie with vanilla ice-creme.


My notes


- Don't bake in higher heat than 350 degree. I think a bit lower than 350 is fine so that you got the shiny sugar crust which develops with time. If it is baked under high heat, the batter will dry out before the sugar molecules float up to the surface and caramelize. And you end up with a dry and matted-surface brownie.

- I think putting a shot of espresso would be a way to go. I am not caffeine addicted, but am a coffee addicted. (confused !?)

- I would omit the cocoa powder. It does nothing to improve the flavor. Rather, I love the acidic taste in bittersweet chocolate.


And last but not least.....keep in the fridge for 2 days for chewiness. See, it's a good thing that this can be baked ahead ! Wrap in Ziploc or plastic box. If you fear of strange odors. You can place a tablespoon of espresso powder (instant or freshly ground are all fine) beside brownie. Even after 1 week when you put it out for afternoon snack, you got brownie's sweet smell, not the anchovy pasta you put in the fridge last night.

Dear Cook's illustrated magazine - when it comes to brownies, it's hard to please everyone.

Thursday, November 13, 2008

Cherry Flan

I was standing in front of super market freezer, having an emotional break down , finding out that there was no whipping creme on the shelf. Oh my, I stopped by 3 different places and they were running out of this thing? The only one carton was the French creme, President, which costs twice as much. Um...may be they didn't carry them anymore, I thought. But this is an expat market, they usually don't have a merry-go-round merchandises (if you've lived in china, you know how fast things discontinued on the shelf , especially imported stuff. For instance, one day you surprisingly/happily find a bar of new zealand butter in the freezer, you plan to by them sometimes, one week later, it's replaced by a pack of frozen dumpling, as easy as that) Maybe they found out that this is not a money-maker (?) I don't think so. Nestle creme (yeah, this is what I'm looking for, I didnt' mention it earlier) , the swiss name-locally made is somewhat popular. I just had hoped that there was nothing to do with Melamine scandal in dairy industry. Anyway, heading home sadly, I bought a pack of salmon instead, need to cure my disappointment with fish congee, my comfort food.

I need to bake something, something doesn't require whipping creme. Flipping through my recipes collection and stopped at a Blueberry Flan. I wrote a remark that this was very good. I baked it in 1996 when I was in collage. oh gosh, That was so, 12 years ago....my my my. I was such a rooker. The book was my second cook book that I illegally copied from a friend because I couldn't afford it. I treasure it as my mentor. I love this book and would recommend anyone to have it. It's called "The Best of Baking" by Annette Wolter, Christian Teubner, 1991. There are only used version by now. Unlike some of recent cook books, every recipes are so reliable and worth trying.

The pie shell, was the use of cooking crumb (from fine cooking magazine) left from my previous baking. It was SO...o..o...o good that everyone was asking me what I used as the pie base. It was crunchy, caramel-liked and has little nutty flavor. Here is the recipe.


Flan base (cookies crumbs - you can make this weeks ahead and keep them in airtight container)
This one is a little difficult to hanlde, I have to warn you. It tends to stick to the perchment/wax paper. Once done, put the tray off the oven and spray little water on the back of the baking sheet, it will be easier to peel off that way.
1/2 C of butter
1 C nuts of your choice , finely chopped.
1 egg
1tsp vanilla
1/2 tsp salt
1 C sugar
Turn on the oven 350 F
In medium heat, put the butter in the sauce pan. Brown it carefully, once you see it turns golden / light brownyish, immediately remove from heat , as it conitnues to cook even though removed from direct heat. Pour into an empty bowl, set aside for 5-7 minute. In a separate bowl, put egg, vanilla, salt, sugar and beat slightly with fork. Gradually pour in butter and stir until blend. Scoop a heap of teaspoon full on the well-greased wax paper, spare 2 -3 inch apart as these things spread a lot. Bake for 5-10 minute until gold brown. Once done, remove from tray and let it cool for a few minutes. Gently turn the Cookie sheet upside down , spray little water on the back side of the sheet, wait until it absorbs the moist before you start to peel the sheet from the cookies. Be careful not to over-spray, you dont' want your cookies to be soggy, do you?

Smash them in the bowl and put in the removeable base pan. You dont' need butter as the cookies crumbs are butter-rich. Be sure to have a foil wrapped under the pan as butter will leak during baking. put this in the fridge while prepare filling


Filling (Adapted from The Best of Baking , 1991)
3 cups of blueberries (I used maraschino cherries)
3 eggs, separated
3/4 cup (125g) granulated sugar
1 cup (125g) toasted ground almonds
powder sugar , for dusting
Dry cherries on paper towels. Set aside. Beat egg yolks and half of sugar until pale and creamy, mix in ground almonds. Beat egg white until stiff then beat in remaining sugar. Fold egg white into egg yolk misture. Stir in cherries.
Pour on flan tin and bake at 375 F (190C) and bake for 40 minutes. Cool 5 minutes in tin and transfer to the rack. When completely cool, sift power sugar over top or serve with whipped creme.
I chilled this over night so that the base was hardened a bit. Be sure to get your friend stong folks to dig as the base is a chewing-challenger. Enjoy!

Thursday, June 19, 2008

Bitter Chocolate Cheesecake


This is the third (or may be fourth) time I made cheesecake. The result is always heavenly decicious and I doubt it very much (I borrow this phrase from my freind, Kate, who always begins her conversation by sayting this) if I'm in love with it. Or I just dont' have a criteria to judge what is a good or a so-so cheesecake (just like when you fall in love with someone that you can always see good side of him/her). I reduced half of sugar from what recipe called for and doubled-up cocoa and espresso so that I would end up having super intense caffee-choco taste. And hey, I got what I'd hoped for.

Verdict: The texture is not as dense as new york cheese cake but firmer than the French one. I love it this way coz it's manageble and that you can sieve cocoa powder or anything on it withour worrying the moist would swallow it down.

The above photo is taken 4 days after I made it. Looks a little rough but it sure tastes even better in later days.

Here is recipe.

Ingredients (everything at room temperature)
700 g Cream chese (soften)
6 eggs
2 c yoghurt
80 g sugar
16 oz bitter sweet choc (melted)
2 shots of espresso
4 tablespoon of cocoa
1 tbsp flour

200 g Oreo or Chocolate biscuits
100 butter (soften)

Prepare the base, add togeter butter and oreo. Squees them to make a dough. Consistency check: if they stick together as a ball, it's ready to go in the tray. If not, add more butter.

Put wax paper on to 9inch base. Press biscuit firmly using back of spoon.

Befor you make filling, put 9x12 inch tray in the oven. Add hot water half way thru.

To make Filling

Sofen cream cheese. I used a big fork and whipped it down for 10 min. I toned up upper arms by the time it was soften. As I warned you, make sure it is warmed down at room temp so that you don't have to work hard stirring it. My kitchen temp is around 30 C. So, if yours are 10'ish, you'd better leave it in slightly warmed oven. Okay, then add sugar, muscle up you biceps once more, stir till well blend.

Then, add egg, one at a time, stir well in each addidtion. Now the texture is yogurt-liked, add yogurt. Stir til just blend. If you are thinking about using a whisk, forget it, coz it'll add excess air in the batter which is not good.

In a separte bowl, add melted chocolate, espresso and cocoal powder.

Pour coffee+chocolate into creamchees mixture, stir until well blended.

Now your baby is ready to go. Pour into 9-inch pan over oreo base. Put on the water-tray , bake for 60 minutes at 170-175 C. Dont' sneak peek, you've got to be decipline. :-0

Once done, let rest in the oven for anohter 60 min. Then, before you go shopping, put it in the fridge for a few hours before cut and serve.

Decoration: Make patterns with cocoa powder or Chocolate leaves. I love to use the real leaves but it was raining outside, so I used maple (plastic) template.

FYI - I left a few pieces in the fridge for a week. It didn't weep and tasted heavenly good. Belive it or not. That's why I call this one "my baby".

Friday, May 2, 2008

Muffin Muffin


It's longgggg holiday and I get stuck at home. I am amazeded how the weather changes swiftly from winter to spring. I want to go city-walk but better do that late afternoon. So my plan is to make something nice and quick out of loganberries I bought last nite from street vendor, 5 yuan for a small basket.

Muffin can be nicely paired up with a good cup of coffee. I wish I have an expresso machine to make a nice cup of my own. May be I stop by coffee house later.

Mmm... I have colorful muffin cup but decided to use perchment paper. It looks retro yet give the sense of homemade muffin.

Here is the recipe from Elise's website.

Mix these dry ingredients together

2 cups all purpose flour
1 Tbsp baking powder
1/2 teaspoon salt

Whisk these wet ingredients together

2 large eggs
1 cup sour cream ( I use yoghurt)
1 teaspoon milk
2/3 cup sugar
8 Tbsp warm melted butter (1 stick)
1 teaspoon vanilla


Set aside 11 oz of fresh blackberries

Once you put the dries with the wets, do not overwork or the batter forms gluten and you'll end up with rubbery/dense muffin. The batter should not be smooth though. Lightly flour berries and mix in the batter gently. Fill in 3/4 of muffin pan. On the middle rack, I bake at 180 for 30 min or until wooden tooth pick inserted in center comes out clean. I dont' think next time I need to grease the perchment paper as the batter is lubricated by a fair amout of butter.

Verdict: Moist, fluffy and butter-rich. This is a no fuzz recipe and a keeper.

Got to go for a hot cup of latte. bye!

Thursday, May 1, 2008

Mochi (modified)


This is a modified Japanese Mochi. The ingredients is nowhere near the original. I guess small bite-size that resembles mochi that make people call it this way.

You can consider this as a healthy snack, I do. I love to have a few bites and drain down with a cup of tea. If you want to make this, get prepare well ahead of time to soak the beans overnight though.

Here is recipe.

Mix together these dry ingredients
All purpose flour 250 g
Baking powder 3 g
Baking soda 2 g

Mix together these wet ingredients
Egg yolks 1
Melted butter 40 g
Water 100 g
Sweetened condensed milk 125 g


Mix the wets to the dries to form dough. It should be soft but not gooey. The texture should be similar to that of clay. Add little flour if needed. Rest for 15 minuntes.

Black-bean filling
Black beans 250 g (soaked over night)
Sugar 150 g
Melted butter 40 g
Baking soda ½ tsp
Vegetable oil 2 tbsp
A pinch of salt

Bring black beans and baking soda to a boil for 20 minutes. We will put these in the mixer and dry it out again in the pan. So you have to drain out excess water. I cannot tell exactly how much liquid each machine needs in order to mix it finely. Different makes handles dryness differently though. I drained out too much water and that my cheap mixer got stuck so I poured little water back in.

In the mixer/blender , add sugar, butter and oil. Mix until form fine paste. Return ingredient to the pan under low heat. Dry it out a bit. You can test it by scoop out a portion and spat down back to the pan. If it disappears of blend with the rest of the paste….dry it out a bit more. Remember don’t over dry coz when it’s completely cooled down, it forms harder, more manageable texture. Oh you know what, you can taste the paste if it’s just as sweet as you like. I stick with the recipe as I don’t like it too sweet. Once finished, let it cool down.

Now the fun part begins. Cut the dough in to a golf ball size. Use the thumbs and yr finger tips to spread it out in circular motion. Ensure the trim is thinner than center coz you will finally put the trim together to form the ball. Add fillings, ah-ah, not too much, I know you love fillings, everybody does !. But believe me you don’t want to end up in a mess where black bean paste splats around your hands. Try your best to wrap it up. You may use water to ensure the dough is firmly sealed.

Bake 170 C for 10-15 minutes until golden brown.

Wednesday, March 26, 2008

Banoffee


Banoffee is indeed many people's favorite. It combines the best of desserts family : Pie cruset made with eveyone's favorite cookies Oreo, sweet / rich caramel made from sweetened condensed milk, bananas with chewy texture and finally soft cremy whipped creme that melts in your mouth.


Although this is easy to make, it requires up to 4-5 hour for prep time. Here is the recipe.


Ingredients


Pie crust

2 cups of Oreo crumb
1/2 - 2/3 cups of soften butter

---> mix together oreo crump and butter. It should be able to form a ball when squeezed. If not , add a dollop butter. Chilled 2 hr until fork-firmed.


Filling

2 cans of Sweetened condense milk
2 bananas
Brownie bits soaked in espresso(optional)

--> In a glass container or Pyrex, microwave condensed milk at medium low for 15-20 minutes, stir every 5 minute until golden brown. The color should be similar to that of caramel's. Cool completely before use.


Topping

2 cups of whipped creme
1 tablespoon of gelatin powder

---> soak gelatin with half cup of cold whipped cream for 1o minute. Pour remain whip creme in a cold bowl (I put the bowl out the window, it was 5 C outside). Beat until thickened, mix in soaked gelatin, beat til it forms hard peak from the whisk.


Garnish: thinly scrapped chocolate.


Once the pie is chilled until firmed, spread in the caramel (must be completely cold). It may be a little sticky but that's okay. Sliced bananas and lay them on. Put on brownie bits (optional). Then put it whipped creme. You can just squeeze whipped creme from ziplock, make it messy look. Sprinkle with chocolate bits.


Tuesday, March 25, 2008

Sweet Potato Pie

I bought a big head of sweet potato the other day. It was CNY 7 (around USD 1). Planned to have a bite right away but finally ….decided to kick up a notch, sweet potato pie. How does that sound?

I looked up for a pie recipe on the web. Found one which has an award winning at county fair. Okay, this is it. The filling? Umm, looked up and found Alton Brown’s recipe which calls for yogurt instead of butter and (evaporated) milk. Well, I run out of milk and butter, what a co-incident. Besides, definitely this is good for health, not sure how this would turn out.

Pie crust prep time requires chilling, next time I’ll give it 2 hr rest so that it’s easier to roll out. This time it was a bit thawed and wet and that’s why it was sticky to plastic wrap while rolling. One batch of dough fit well to a 9’inch pyrex.

Verdict : Pie crust, browned on the side, not at the bottom. The browned side is crisp and I love it. The county fair pie crust is to keep. Next time I’ll bake blind so it’s crispy at the bottom too. Filling is very nice, given its fat-free. For those who are a big fan of creamy pumpkin pie may alter yoghurt with evaporate milk and butter. Maple syrup and toasted walnut is a nice to have.